Summer Breeze building notes -
Day Four October 11th, 2000More true confessions. Part of the fun of boat building is being clever about fixing mistakes. I got a good opportunity for cleverness today.
As I began to piece the back together I realized it seemed smaller than it should be. It turned out I didn't make enough allowance for the external chine log. Also, I failed to realize that my slotted stem (as much as I love it) puts the theoretical apex of the sides a couple of inches out in space beyond the bow of the boat. Ain't boat design fun! This is why I don't just build by plans... I'd miss all this!
Today reminded me of a great Yogi Berra quote I got from Lew Clayman.
"In theory, there is no difference between theory and practice. In practice there is." -Yogi Berra
On to the solution.
An internal chine log or a stitch and glue version of Summer Breeze would work with the current dimensions. However, even so, I was able to fudge it via the miracle of PL Premium "inlay."

. If you haven't glued up your sides and transom yet, here's what you do. To get the bottom to fully cover the external chine logs, the transom needs to be moved forward 2 1/2". (This includes the original 3/4" I moved mine previously.) The transom is so thick I was able to hold the bottom back a 1/2" from the back edge of the transom. This still allowed sufficient chine joint at the bow. It seems my obsession with getting the most from the least made me dance a little close to the edge. Hey, what can I say... it worked in theory! ;-)
After dry fitting the bow sections, get under the boat and mark the inside perimeter. This will show how much to back set the butt blocks during gluing.
The butt blocks are made from the trim pieces from the sides.
The gluing steps are identical to those of gluing the sides. Put down plastic - dry fit & mark - spread glue with notched trowel - staple with 1/2" staples.
I once again stapled over twine which works well. I did pre-bevel the butt blocks this time using my band saw and belt sander, which seems easier than sanding the taper after they're glued.
The chines are planed level with a hand or power plane. A straight edge helps. A long board with course sand paper on one end will work also. Resting one end on the other chine keeps the sanding end level.
After the back is glued up, it is dry fit and marked at chines. Make sure the boat is aligned before you mark the back. A string pulled tight from stem to stern should cross the center line of your frame. If it doesn't nudge the hull around until it does.
The back is trimmed a little outside the line with circular saw. How close you cut it depends on your confidence and what tool you will do your final trim with. If you flush route like I do, it's not too critical. If you'll take the overhang off with a hand plane and sanding block, accuracy cutting this line can save work. Some folks even tilt their saw blade for this.
This is a good time to fill any blemishes in the back. It's easier to sand at bench level then after it is the inside of the boat. Yes, that's Elmer's exterior filler I'm using.
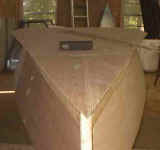
The back is now dry clamped in place.
I made this little marker that makes it easy to mark where the nails will go in the chine log. It also has a 5" piece of wood that determines the spacing.
Here it is in use. Mark with a pencil or an awl.
I pre drilled for the nails and tapped them all in their holes. The nails are spaced 3" apart along the transom, 5" along the sides. These are the #14 by 7/8" bronze ring nails.
Half of the boat is unclamped and propped open. Glue is applied and spread. The back is then closed and clamps and nails are applied from the middle out.

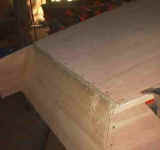
Here is how I used PL to fill the gap at the transom and bow. It should sand out fine.
I used a nail set to very slightly countersink the nails then filled them.
Next come the quarter knees and breast hook and gunwales and inwales.
I'm re-thinking the sail. Here is a sketch of a 75 ft. lug rig with a sprit boom. I haven't drawn the boom in.
This is not a balanced lug rig as I show on Featherwind. The Tack (lowest corner of sail) of the sail is at the base of the mast. I will probably use a bamboo spar (stick at the top of the sail) and sprit boom (a stick with one end attached to the aft corner (clew) of the sail and the other end tied to the mast - similar to the way wind surfers are rigged) This puts the mast step closer to the middle of the boat lending more rigidity to the hull even if no fixed rowing seat is installed. (Incidentally it will leave just enough space forward for my dog, Kayla, in her cart. ;-)
That's it for today.
I welcome all feedback on this experiment in making the building and design process public. Feel free to drop me a line. David Beede simplicityboats