|
Just Build It!
|
 |
 |
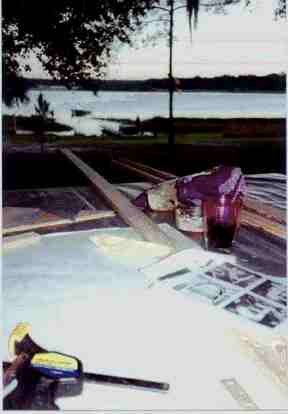
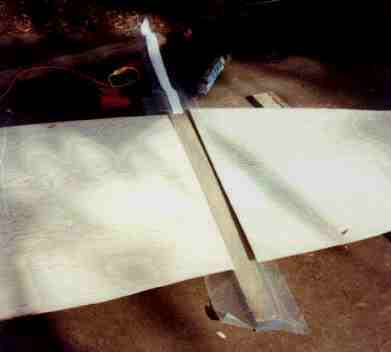
First you cut 2 sheets of ply into 20" strips and glue them together into two 16 foot strips. It's the simplest
scarfing approach. 2" glass tape and epoxy on each side, with ends
simply
butted together. Strips of
plastic under weights make for a smooth results so little sanding is
needed. (See gluing the back below.)
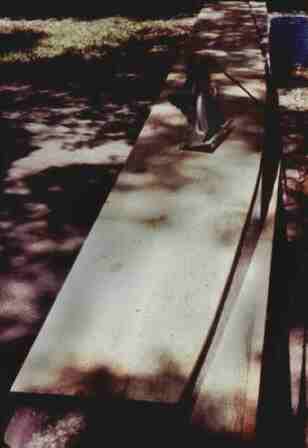
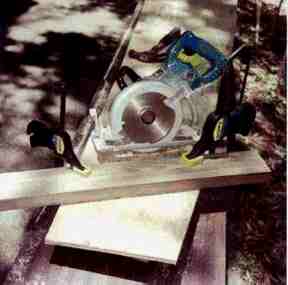
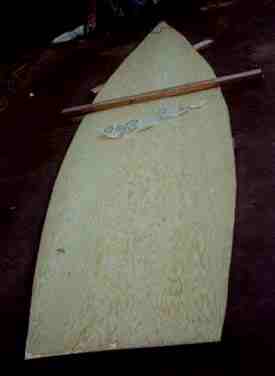
After lofting (drawing some station lines, then playing connect the dots.) the sides get cut with a shallow set circular saw. It's easier to cut a fair curve with a skill saw then a saber saw. |
Bow and stern angles get cut with a simple fence clamped to the ends of the panels. |
 |
|
|
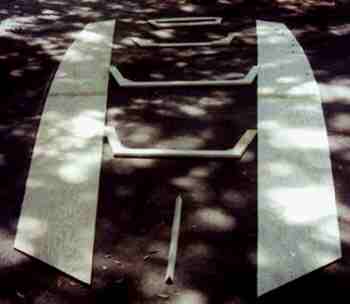
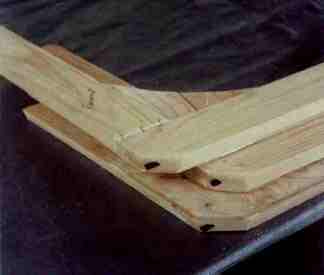
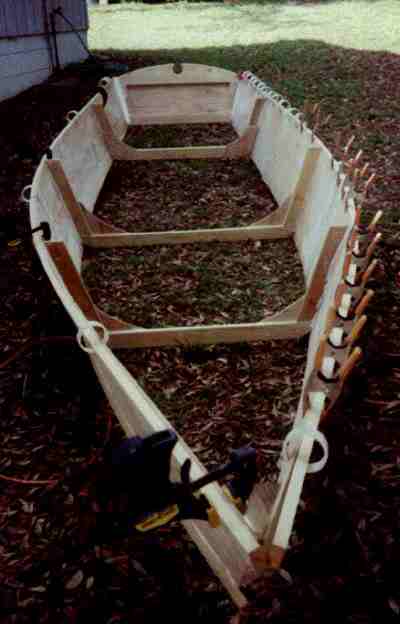
Frames are of 1x3, I used cypress. The corners are reinforced with 1/4" plywood gussets. Getting the bevel angles right might be the trickiest part of the boat. (The black things are 1/4" Delrin pins. Simple fairleads for lines I fantasize running through the limber holes for a basic tiller control.) |
|
 |
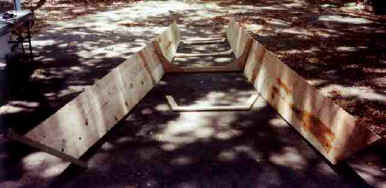 |
The sides are attached to the center frame like a big H. |
|
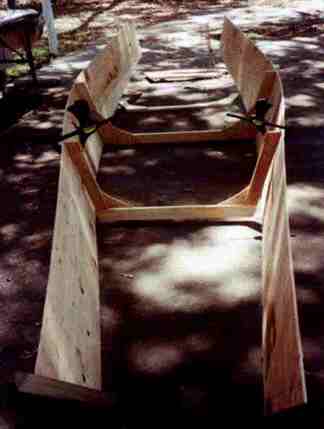
Next the other frames get attached. |
 |
|
|
Then the stem. |
|
Then the transom. |
 |
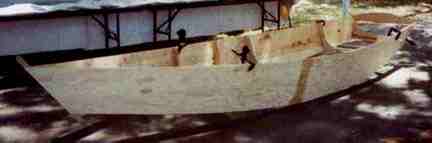 |
She changes from a pile of wood to a boat before our eyes. |
I've only dry fit everything here. It'll get glued later. Mark fore and aft clearly on the frames, if you start gluing them facing the wrong way, things get very messy. (At least that's what someone tells me;~) |
 |
|
|
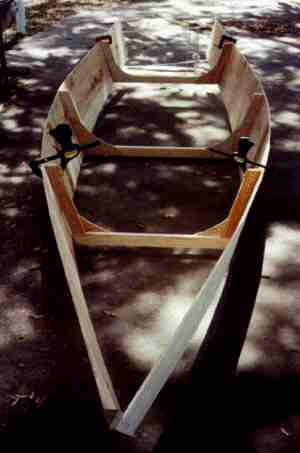
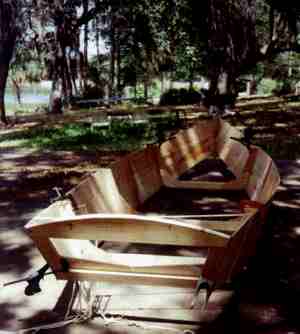
I did the frame gluing upside down, using a long level to make sure the frames are flush with the bottom. |
Time for the other bits and pieces, like gunwales and chine logs. |
 |
|
|
The gunwales go together with glue and screws and lots of clamps. Cutting sections of PVC pipe into "C" clamps works well. I used PL Premium - which is a polyurethane glue that comes in a caulking tube. |
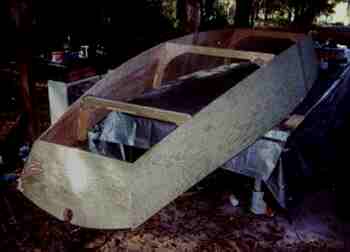
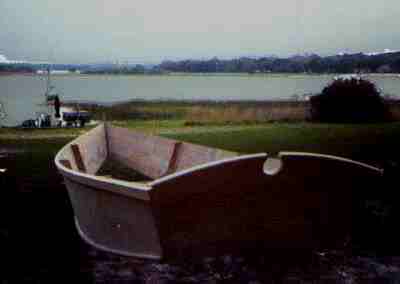
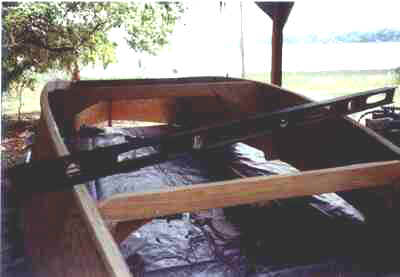
Gunwales and chine logs are on. At this point she's a bottomless beauty. |
|
|
|
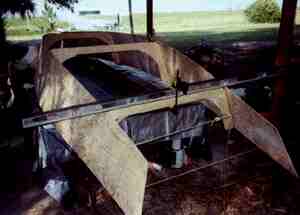
Scarfing the bottom is the same as the sides. I learned controlling all the pieces is the trick. The two pieces are glued in a sandwich. Clamp board - plastic sheeting - 2" glass tape in epoxy - back pieces (edges pre-saturated with epoxy) more epoxy - glass tape - plastic - top clamp board - weights. |
|
|
I did a dry run, then stapled the glass tape and plastic strips. Also after butting the back pieces in the actual gluing, I stapled them out at the edges to keep them from slipping around. |
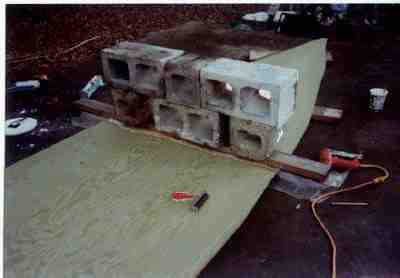
Concrete blocks work fine for weights. I suspect two curved boards faced with Formica and release agent could be nice if I did this a lot. |
 |
|
|
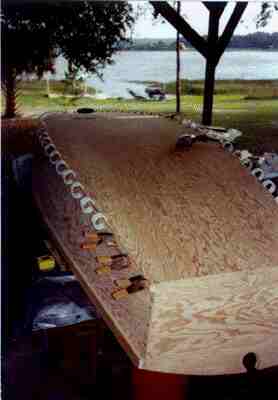
Some 40 grit sand paper attached to the edge of the level makes a good tool for preparing the sides for the bottom. Body shop supply stores sell these for fairing car bodies. They come with peal and stick adhesive and work great. |
|
The bottom goes on. My kingdom for more clamps! |
|
My wife, Julie, is checking out the emerging craft for performing her favorite sailorly command. "Prepare to lay about!" |
 |
|
|
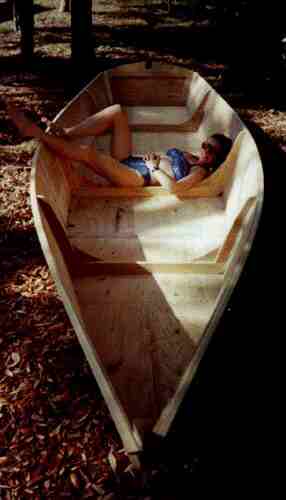
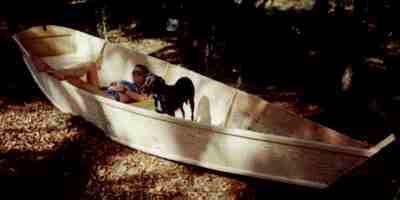
What more does a boy need? His girl, his dog, and his boat! |
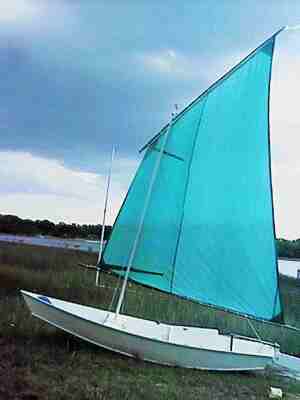
| A bit of trimming and sanding,
mast partner and step, four coats of exterior latex house paint, lee board and rudder, and one poly tarp lug sail later... And she's ready to go! There... as easy as that! |
 |
Feel free to contact me if you have any questions.