Summer Breeze building notes -
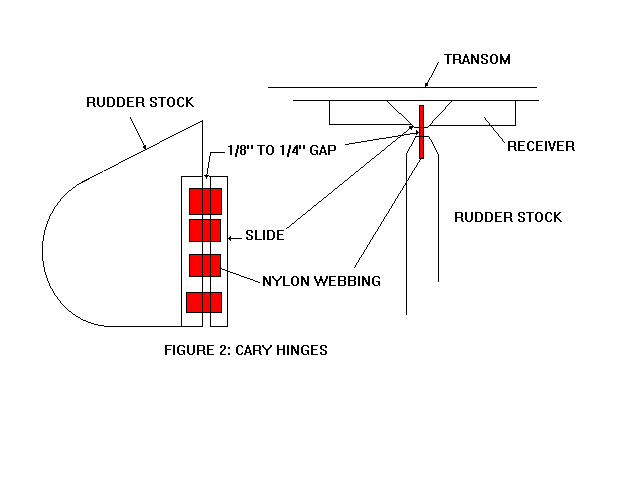
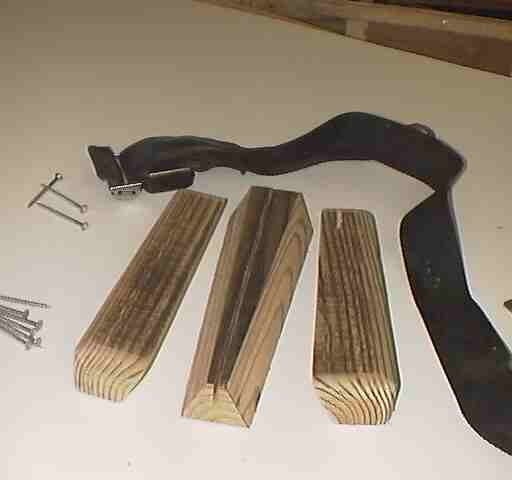
Day Eight (Oct 17, 2000)Worked on the sailing bits today. I was doing my home work at Jim Michalak's site regarding rudders and leeboards (more leeboard info) when I ran across his review of Ted Cary's idea about using nylon seat belt webbing in place of pintles and gudgeons. (The hardware that holds the rudder on.) Now I have a set of bronze hardware from Jamestown Distributors, but this method intrigued me. Mounting and removing the rudder should be easier. Though it takes a little time to make, the materials cost is negligible.
Here's Jim's sketch. His write up on it is here.
And here's how I decided to modify it. Ted also glued his webbing with epoxy. I'm going to try using PL Premium (of course) but I'm also interested in some kind of mechanical hold that might let you change the webbing if necessary. Here's one possibility.
This is similar to the way canvas is held in directors chairs. A hole is drilled at the bottom of the Kerf, and the webbing wraps around an 1/8" brass rod. I'll let you know how the experiment turns out.
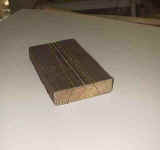
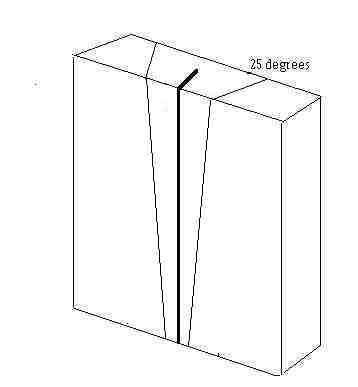
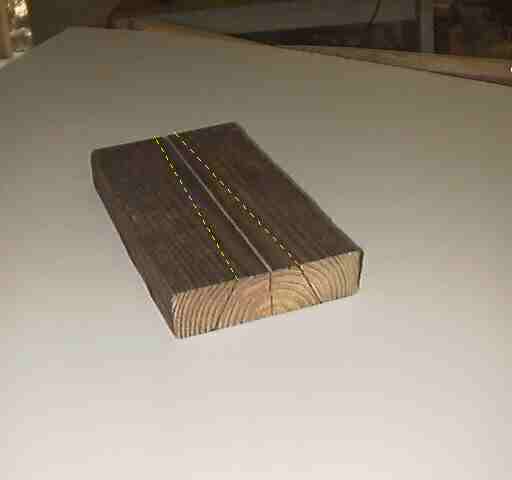
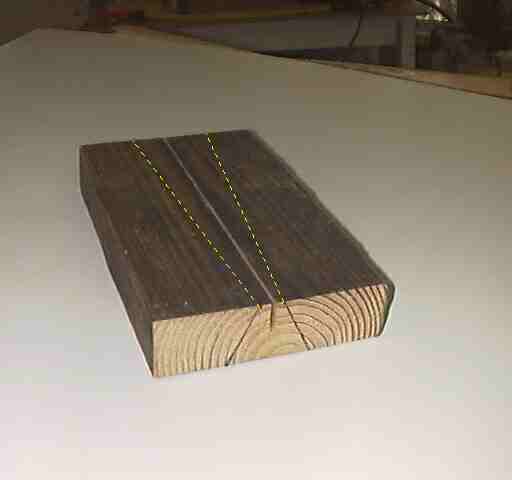
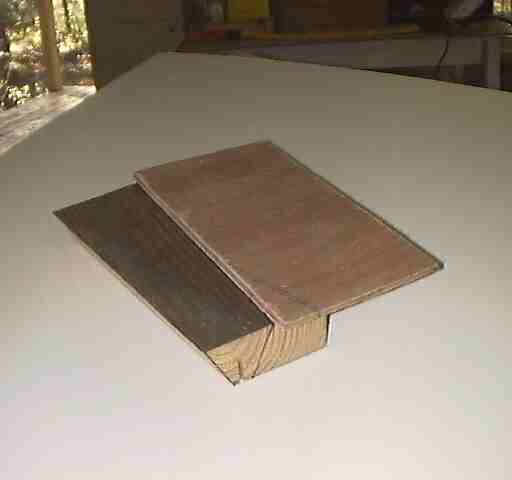
I started with a 10" piece of 2x6. I cut a 7/8" deep saw kerf down the center. The yellow dotted lines show how I modified the design by tapering the insert. In instrument building this trick is used to join necks to bodies. In theory when you insert it it will snug it up against the transom.
This could all be done with a hand saw, but I used the table saw. I don't own a taper jig. But here's an easy way to cut a taper using a scrap of plywood. I set the saw to 25 degrees and clamped the fence about 5 inches away. I ran a scrap of plywood throught the saw. I then lined the cut edge of the ply up with marks I made on the BOTTOM of the wedge stock. I stapled it in place with 1/2" staples and ran in through the saw. I then pulled it off and stapled it to the other line. Works great.
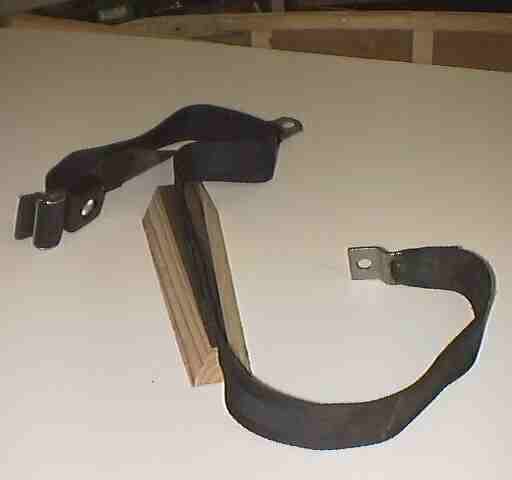
Here's the wedge with the seatbelt webbing trial fit in the saw kerf.
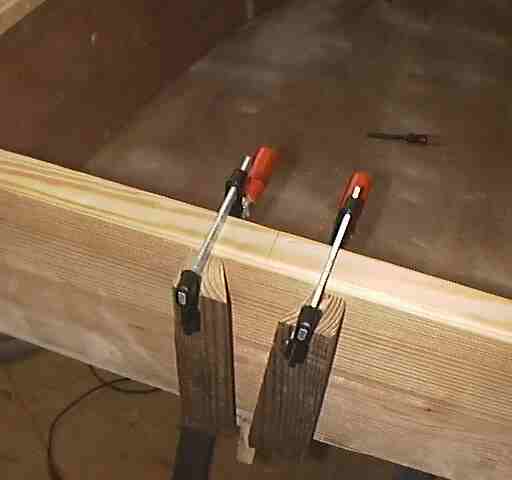
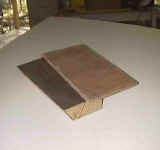
Here are the receivers trial clamped to the transom.
I shortened the receivers so the wedge is longer so I could tap it loose if it should get stuck. I've also rounded the edges and sanded them some.
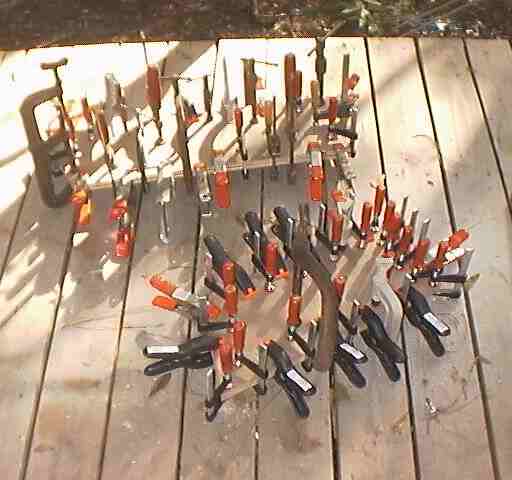
I laminated two 1/2" pieces to make up my rudder and leeboards 1" thick. I used 1/2" on Featherwind, but it sometimes seems a little flimsy and isn't very straight. It's also hard to imagine standing on the leeboard to turn her over. So I'm beefing these up a little. If you decide to use 1/2" I recommend laminating it from 1/4" to prevent warping. (If you lack enough clamps you can use heavy weights and/or dry wall screws to laminate these.)
Rig details:
Here are my latest sail calculations. I notice Dave Carnel is now recommending using hot melt glue to make polytarp sails, which I going to do some tests on.
The sketch also show's the mast and leeboard positions.
Jim Michalak's Lug Rig info is the best. He shows how to add shape by using darts.
That's it for now. More about rudders and such later.